Tuesday, December 13, 2016
How to set up wireless printer brother
How to set up wireless printer brother
 |
wireless printer brother |
For example you use a printer brother dcp-J220, this printer in addition to scan and copy are also equipped with fax facilities as well as the number of button or key figures that we use as an option to operate some functions of the printer brother.
Brother printers enrich other interesting features, as time passed it completes its brother printer with networking or wireless access facilities. Processes use the print media usually uses cables, now no longer required in the printer sebahagian printer.
Easier to use you just need to set the printer and computer / laptop, in order to make communication via a wireless network.
As a note to facilitate you utilize existing wireless features on brother, here we provide a brief explanation of how the wireless settings brother printer:
Printer Factory Reset
- Press the "Menu" button on your printer machine
- Use the up and down buttons to find the menu "Network"
- After the Press "OK"
- Select "Factory Reset", then press "OK"
- Press the number "1" (if there is a button fax printer, if not look at the screen for instructions), the machine will automatically reset to its network.
Setup Wizzard to enable wireless
- Press the "Menu", then use the search button on the bottom menu "Network", then press "OK".
- Select the "WLAN", then press "OK"
- Select the "Setup Wizard", and then wait while the engine will look for the SSID, if the SSID has been finished, press the "Clear / Back"
- Wi-Fi icon will be on the top screen.
Setting to Computer
- Insert the CD Driver
- Select the desired language (eg English here)
- Select the "Initial installation"
- Then select "Install MFL-Pro Suite
- Select Yes and wait a minute
- Select the "Wireless Network Connection and select the next
- Check all the options and select the next again
- If you detect wifi printer and select the printer next to the exit message and required to restart
- If you do not detect wifi, select option 2 is to specify your machine by address
- then you fill in the IP address that is in the printer to the empty column
- How to check the IP address on the printer, select Menu -> Network -> WLAN -> TCP / IP -> IP address
- If it is the computer will immediately process, until there is a message "Brother Registration", if there is then select the next and restart the computer.
Setting On the Wireless Network Connection
- On the PC / Notebook find the Wireless Network Connection
- After that select the "SETUP" in the option choose a wireless network
- select Connect
- Also select "Connect Anyway" and wait a minute
- Wait a minute until the Wireless Connected
Note :
The way this setting applies to the type of printer brother contained wireless system.
Go to link download

Thursday, December 1, 2016
How to setup a wireless network mg5320 for windows
How to setup a wireless network mg5320 for windows
How to setup a wireless network pixma mg5320 for windows - Multifunction installation to your network for the first time canon pixma mg5320.
Network Requirements
Before connecting the machine to the network, make sure that configuration of the computer and access point or router is complete, and that the computer is connected to the network.
 |
How to setup a wireless network |
Wireless Connection


An "Ad-hoc connection," which establishes a direct connection to the computer over a wireless connection without using an access point, is not supported.
A wireless access point or router is required to use your printer on a wireless LAN.
Notes on Network Connection
- The configuration, router functions, setup procedures and security settings of the network device vary depending on your system environment. For details, refer to your devices instruction manual or contact its manufacturer.
- In an office setup, consult your network administrator
- If you connect to a network that is not protected with security measures, there is a risk of disclosing data such as your personal information to a third party.
- If an error message appears or if you have trouble with the network connection, refer to the printed manual: Network Setup Troubleshooting.
- Place the machine and computer on the same network segment
Software Installation Network
To use the machine by connecting it to a computer, software including the drivers needs to be copied (installed) to the computers hard disk.The installation process takes about 20 minutes. (The installation time varies depending on the computer environment or the number of application software to be installed.)
Importan
- Log on as the administrator (or a member of the Administrators group).
- Quit all running applications before installation.
- Do not switch users during the installation process.
- Internet connection may be required during the installation. Connection fees may apply. Consult the internet service provider
- It may be necessary to restart your computer during the installation process. Follow the on - screen instructions and do not remove the Setup CD - ROM during restarting. The installation resumes once your computer has restarted.
- If the firewall function of your security software is turned on, a warning message may appear that Canon software is attempting to access the network. If such a warning message appears, set the security software to always allow access
Installing the pixma mg5320 on Your Wireless Network
If you are installing your printer on your network for the first time, a step-by-step walk through of the wireless setup is built in to the installation routine of the software that shipped with your PIXMA.
Insert the Setup CD-ROM
That came with your printer into your CD-ROM drive and proceed through the easy to follow instructions. Follow the on-screen instructions. Be sure to select Wireless connection on the Connection Method Selection screen (1-2). Continue to follow instructions until the Setup Procedure Selection screen (3-1)appears.
Next a detail complete guide : Download guide manual
Go to link download
Sunday, November 27, 2016
Canon Pixma MG5320 Driver Wireless Inkjet Photo
Canon Pixma MG5320 Driver Wireless Inkjet Photo
 |
Canon Pixma MG5320 Driver |
Built-in Wi-Fi1 tech allowing you to easily print and scan wireless virtually Everywhere around your house. Print gorgeous, borderless at home up to 8.5 "x 11" size with a maximum a print resolution of 9600 x 2400 color dpi and five individual ink tanks.
Have a all sorts of fun new with your images by adding a new effects like Fish Eye, Reviews Miniature, Toy Camera, Soft Focus and Blur Background before you print out. Enjoy the new ball as Pixma Cloud printing option link allows you to easily print images from online photo album Canon Image Gateway and Picasa as well as templates include seasonal outdoor a stationary and calendars from a compatible Canon Pixma Wireless All-in-One, all without any computer.
Built-in Auto Duplex Printing allows you to automatically print on both sides of the paper and can help paperless and costs up to 50%. MG5320 also lets you print on CD, DVD and Blu-ray, and you can even turn your HD Movie clips into beautiful photos.
Look a beautiful, easy-to-view scans by advanced image analyzers and area-by-area corrections to the data, will automatically. Plus, you can print and scan jpeg and pdf files wirelessly from compatible iPad, iPhone, iPod touch, and Android devices without a computer. And, enjoy the option printing directly from the on a compatible memory cards, USB Flash Drives, PictBridge and optional Bluetooth devices.
Easy-WebPrint EX:
The print exactly what you want from a web, easily. Easy-WebPrintEX allows you to create your own layouts, take different sections of different website and put them all on one page. Move, resize and crop your clips, insert and edit text notes, making it a portrait or landscape, print up to three columns on a page and even save the table as a PDF file.
Pixma Cloud Link:
Easily print pictures from online photo albums Canon Image Gateway and Picasa as well as templates including seasonal a stationary and calendars from a compatible Canon PIXMA Wireless All-in-One.
AirPrint:
Wirelessly print photos, email, web pages, documents, and more from compatible iPad, phone, or iPod touch to a compatible Canon Pixma Wireless All-In-One.
Mobile Printing:
Take full advantage of the Canons Wi-Fi connectivity to unlock, print and share your photos saved there. Print photos wirelessly from compatible iPad, iPhone, iPod touch and Android devices.
Please download the following printer driver according to the printer you are using, if there is a broken link contac us!
| MG5300 series Mini Master Setup (Windows 8.1/8.1 x64/8/8 ) | 10/01/13 | 23.49 MB | Download |
| MG5300 series MP Driver Ver. 1.01 (Windows 8.1/8.1 x64/8) | 10/01/13 | 17.39 MB | Download |
| MG5300 series XPS Printer Driver Ver. 5.56a (Windows 8.1/.) | 10/01/13 | 15.40 MB | Download |
| MG5300 series Master Setup (Windows 7/7 x64/Vista/Vista64.) | 07/25/11 | 171.44 MB | Download |
| Easy-PhotoPrint EX Ver. 4.5.0 (Windows 8.1/8.1 x64/8/8 x64) | 01/07/15 | 57.54 MB | Download |
| Easy-WebPrint EX Ver. 1.5.0 (Windows 8.1/8.1 x64/8/8 x64) | 01/07/15 | 17.43 MB | Download |
| My Image Garden Ver. 3.1.1 (Windows 8.1/8.1 x64/8/8 x64/7) | 01/07/15 | 292.34 MB | Download |
| MP Navigator EX Ver. 5.0.2 (Windows 8.1/8.1 x64/8/8 x64/7) | 08/29/14 | 47.81 MB | Download |
| MG5300 series Master Setup (Windows 7/7 x64/Vista/Vista64) | 08/16/11 | 171.44 MB | Download |
| MG5300 series Scanner Driver Ver. 18.0.1b (OS X 10.5/10.6) | 10/07/14 | 12.81 MB | Download |
| MP Navigator EX Ver. 5.0.3 (OS X 10.7/10.8/10.9/10.10) | 10/07/14 | 35.41 MB | Download |
| MG5300 series CUPS Printer Driver Ver. 11.7.1.0 (OS X 10.) | 09/30/14 | 16.07 MB | Download |
| ICA Driver Ver. 3.3.4 (OS X 10.6/10.7/10.8/10.9/10.10) | 09/24/14 | 8.62 MB | Download |
| Easy-PhotoPrint EX Ver. 4.6.0 (OS X 10.7/10.8/10.9/10.10) | 01/07/15 | 102.18 MB | Download |
| My Image Garden Ver. 3.1.0 (OS X 10.6/10.7/10.8/10.9/10.10) | 01/07/15 | 297.83 MB | Download |
| MG5300 series Mini Master Setup (OS X 10.5/10.6/10.7/10.8) | 03/21/14 | 50.21 MB | Download |
| MG5300 series Master Setup (Mac OS X 10.4/10.5/10.6) | 07/25/11 | 208.86 MB | Download |
| Canon IJ Network Tool Ver. 3.2.0 for Power PC (OS X 10.4/) | 07/10/12 | 4.79 MB | Download |
Operation System Compability :
Windows 7,Windows Vista, Windows XP and Mac OS X v. 10.4.11 to 10.6.x15
Go to link download
Tuesday, November 15, 2016
HP Wireless Setup Printer For Mac OS X
HP Wireless Setup Printer For Mac OS X
 |
HP Wireless Setup Printer |
HP printer drivers and software before installing updates automatically during the process of updating the operating system.
Installing your printer for the first time on a Mac running OS X v10.10 Yosemite, OS X v10.9 or OS X v10.8 Mavericks Mountain Lion, AirPrint is a standard method to install and create a printer queue for your printer. HP Printer Driver Update is available through the Apple Software Update (ASU) that can be switched from AirPrint to HP printer drivers. ASU automatically download the software. For AirPrint, the printer must already be set on a wireless network.
What are the functions available with AirPrint-enabled printers
With Mountain Lion and Mavericks, adds AirPrint-enabled printer is fast and easy way to use the printer without installing drivers. AirPrint provides basic functions for the printer connected to the (Ethernet) or wireless network cables. AirPrint is not available if the printer is connected to a Mac, AirPort Base Station, or Time Capsule with a USB cable.
Try to connect the printer to a wireless network with WPS method first. If the printer is connected to a wired (Ethernet) or wireless methods, choose a different method.
Method 1: Connect the printer to a wireless network using Wi-Fi Protected Setup (WPS)
Step One: Prepare for installation- Make sure that your network is already set up: Before you can install the printer, your wireless network must be set up. Follow the instructions that came with your router or access point to set up the wireless network.
- Make sure that your wireless-capable printer, router, and computer are all turned on, and that the computer is connected to the wireless network.
- Exit all applications running on your computer.
- Turn off the Wireless setting. If the Wireless light is on, press the Wireless button on the printer control panel to turn off Wireless.
Step two: Connect to the wireless network
Select the option that you want to use to connect your printer to the wireless network, and then follow the instructions.
Option one: Connect to the wireless network using WPS
If your wireless router supports Wi-Fi Protected Setup (WPS), this is the simplest way to set up the printer on a wireless network.
Note:
This method requires a WPS-enabled wireless router to connect to the printer.
Press the WPS button on your wireless router.
On the printer control panel, press the Wireless button . The wireless light starts to blink.
Wait up to two minutes while the printer establishes a network connection with the wireless router.
Note:
If the WiFi-Protected Setup (WPS) method is not successful, try another connection method.
Option two: Connect to the wireless network using an Apple Extreme Router
Follow these steps to install the printer using the Wireless Client Setup Assistant in Airport Utility v 5.6.
Note:
Airport Utility v 5.6 is the last version that supports the Wireless Client Setup Assistant. If you have a newer version, choose a different method to connect your printer to a wireless network.
- From the Dock, click Finder.
- Click Applications, click Utilities, and then click Airport Utility.
- On the right panel, verify that the Airport Utility is version 5.6 or earlier.
- Double-click Airport Utility, and then click Manual Setup.
- On the menu bar, click Base Station, and then click Add Wireless Clients....
- Click First Attempt, and then click Continue.
- On the printer control panel, press the Wireless button . The Wireless lights starts to blink.
- Wait up to two minutes while the printer establishes a network connection with the wireless router. Once the printer connects to the router, the printer name appears in the Wireless Client Setup Assistant window. Click Done.
Method 2: Connect the printer to a wireless network using AirPrint
Follow these steps to add an AirPrint printer in Mountain Lion or Mavericks.Note:
Some printers might require a firmware update to enable AirPrint compatibility, depending on the model and purchase date. HP always recommends updating to the latest firmware version for the best performance and functionality.
- Turn on the printer, and make sure that it has paper in the tray and that it is in a ready state.
- Make sure that the printer is connected to the wireless or wired (Ethernet) network.
- Click the Apple menu , and then click System Preferences.
- Click Print & Scan.
- Click the plus sign at the bottom of the left pane.
- Under Nearby Printers, click the name of your printer.
- Click the Use box, and then select AirPrint from the pop-up menu if it is not selected already.
 |
| AirPrint printer in the Add window |
- Click Add to add the printer to the queue.
Method 3: Wireless setup using a USB connection
Using a USB cable to transfer network settings is an easy way to set up the wireless connection. Follow these steps to install the software using a USB connection, and then connect the printer to the wireless network. Once the printer is connected to the wireless network, you can remove the USB connected printer from your printer list, and then add the wireless connected printer to the list.Step 1: Update your Mac with Apple Software Update
Important:
Before you install your printer, run Software Update to make sure that the database your Mac uses to find available printer software is current.
- Click the Apple menu , and then click About This Mac.
- Click Software Updates....
- Click the Updates icon .
- From the menu, click Store .
- Click Reload Page to refresh the update list.
- If no updates are available, your Mac has the latest software and database installed. Skip to the next step to install the printer.
- Click Install to complete any updates.
Step 2: Install the printer
- Turn on your printer, and then make sure that it has paper in the tray and that it is in a ready state.
- Connect the USB cable to the printer and to the Mac. A print queue is automatically created for your printer, and the printer software automatically installs on your computer. If the Mac already has current software for your printer, the print queue is created in the background.
- Click the Apple menu, and then click System Preferences.
- Click Print & Scan, and then make sure that your printer is in the list of available devices.
- If your printer is not listed, click the plus sign at the bottom of the left pane, click the name of your USB printer, and then click Add.
Note:
Quit and restart any applications that were open before adding the printer to use the updated HP software features.
Step 3: Connect the printer to the wireless network
After completing the USB installation, follow these steps to connect to a wireless network.You can view a video demonstration to learn how to set up a wireless connection, or follow the written steps.
- Click the Apple icon , and then click System Preferences.
- Click Print & Scan.
- Click Open Print Queue, and then click Printer Setup.
- Click the Utility tab, and then click Open Printer Utility.
- Click HTMLConfig.
- Click the Networking tab, and then click Wireless from the list on the left.
- Under Communication Mode, click Infrastructure, select your network SSID from the Available Network Names (SSID) list, and then click the << button.
- From the Security Mode pop-up menu under Authentication, click WEP or WPA/WPA2. Your selection depends on the wireless security protocol your network uses.
- your network does not have wireless security, leave the Security Mode set to Open System (No Authentication).
- Type your WEP/WPA/WPA2 key in the appropriate field, and then click Apply.
- In the confirmation box, click OK, and then close the HTML Config and Print Queue windows.
Step 4: Delete the USB connected printer, and then add the wireless connected printer
- In the Print & Scan window under Printers, click your printer name, and then click the Minus sign to remove it.
- Disconnect the USB cable from the printer and the computer.
- Under Printers, click the Plus sign .
- Select your printer name with Bonjour as the Kind, and then click Add.
Compability System Operation :
OS X v10.10 Yosemite, OS X v10.9 Mavericks and OS X v10.8 Mountain Lion
Go to link download
Thursday, October 6, 2016
HP p1102w Wireless Setup For Windows 8
HP p1102w Wireless Setup For Windows 8
 |
HP p1102w Wireless Setup |
The document is for LaserJet Pro P1102w printer for Windows and Mac operation system.
The document is explain how to install the print drivers and another software for You are printer to use it on the a wireless network. If You are have more than one computer on the network, install the printer software on each computer that you are planning to share the the printer.
How to install the by using wireless, USB and software are available using the printer is always more suitable for you, follow these steps below:
Step 1: Prepare for the Installation
You must have the following items before you install the printer on the wireless network :
Dont worry if you do not have all of the items yet! The HP Print and Scan Doctor can help you gather some of Reviews These items.
1. Gather the following items:
- The Network name: The network name is the SSID
- WEP key or WPA security passphrase
- A computer that is connected to the wireless network
- The Internet access: HP recommends broadband The Internet access Reviews such as cable or DSL
Note :
Accessing the Internet should not be for you to install the printer with a wireless connection. However, you need Internet access to use Web Services, get updates printer, download the drivers from the HP website.
Your wireless-enabled printers :
The place was close to the computer during the installation procedure
2. Make sure that the printers, routers, and computers as well as all turned on, and that the computer is connected to the same wireless network you want to connect the printer to.
3. Then disconnect any USB or Ethernet cable that is connected to the printer.
4. Optional: If you previously installed the software for a USB connection and now want to change to a wireless network connection, follow these instructions to remove the USB installation before continuing.
- Then Right-click the Start button () in the lower left corner of the screen, and then click Search.
- In the search box, type HP, and then click the icon for your printer. Open the printer software.
- Then click Utilities, click Printer Setup & Software Selection, and then click Configure Wireless.
- Also follow the onscreen instructions to complete the software installation. Once the printer has been set up on the wireless network, it is not necessary to continue the following steps.
HP Print and Scan Doctor :
Quickly diagnose and resolve many printing and scanning errors, network connection problems, and driver issues. Available for Windows XP and later.
Download utility (6.3 MB)
Step 2: Connect to the wireless network
Use one of the following methods to connect to the wireless network.
Method 1: Wi-Fi Protected Setup (WPS)
If your wireless router supports Wi-Fi Protected Setup (WPS), this is the simplest way to set up the printer on a wireless network.
Note :
This method requires a WPS-enabled wireless router to connect to the printer.
Press the WPS button on your wireless router.
On the printer control panel, press the Wireless button (). The wireless light starts to blink.
Wait up to two minutes while the printer establishes a network connection with the wireless router.
Note :
If the WiFi-Protected Setup (WPS) method is not successful, try another connection method.
Method 2 : Standard connection using a USB cable
If your wireless router does not support Wi-Fi-Protected Setup (WPS), you can use this method to set up the printer on a wireless network. Using a USB cable to transfer settings makes setting up a wireless connection easier. After the setup is complete, disconnect the USB cable.
- Insert the software CD into the CD drive.
- Follow the on-screen instructions. When prompted, select the Connect through a wireless network option.
- When prompted, connect the USB cable () to the computer.
- Connect the USB cable to the printer.
- When the installation is complete, print a configuration report to make sure that the printer has an SSID name. Follow these steps to print a configuration report : (Make sure that the Ready light is on and that the printer is idle and silent, Press and hold the Cancel button, and release it when the Ready light begins blinking, the Configuration Report prints.)
- When the Configuration Report prints, disconnect the USB cable from the printer.
Important :
You have completed the software installation. Do not perform any more steps in this document.
Step 3 : Download and install the software from the HP website
Follow these steps to download the software, and then install it. Important: If you get any firewall messages during installation, click unblock, accept, continue, yes, allow, or permit, or the installation fails.
Go to link download
Monday, October 3, 2016
Lb Link Wireless Usb Adapter Driver
Lb Link Wireless Usb Adapter Driver
Best lb link wireless usb adapter driver.
Informations:
File name: lb_link_wireless_usb_adapter_driver.gzip
Driver version: 1.5.8
File size: 13 525 KB
Operation System: Win XP, Win Vista, Windows 7, Windows 8
Go to link download
Thursday, September 8, 2016
HP LaserJet Pro P1102w Driver Wireless Printer
HP LaserJet Pro P1102w Driver Wireless Printer
HP LaserJet P1102w Wireless Setup
 |
HP LaserJet Pro P1102w |
Black and white print documents wirelessly from any room and share a printer with multiple people at once.
Other features, plug and print with HP Smart Install :
The new settings for the HP LaserJet faster two minutes without the use of a CD. With HP ePrint to print from a smartphone or tablet.This laser printer can help you save energy with HP Auto-On / Auto-Off Technology, the printer turns on when they need it, off when not using it.
Start by printing faster and finish faster with Instant-on Technology. Her mold up to 19 pages per minute by using the HP LaserJet Printer Pro P1102w. With a 150-sheet paper tray and 10-sheet priority input slot, print business documents in a variety of sizes and media without changing the quality of the paper.
Save paper using HP Smart Web Printing :
print only the web content you want, without ads or menu bar, it also saves space with ultra-compact laser printer that fits the table you. More affordable price, using the HP LaserJet printing wireless devices in the home or office.HP ePrint - Now, printing from a smartphone or tablet device from where sajadan anytime
Save the most energy-efficient power laser printer on the planet
Always use only genuine HP toner in HP printers to produce a nice, even though printing.
HP LaserJet P1102w Wireless Setup Driver For Mac, Windows, Linux
| Compability System Operation | Driver |
|---|---|
| HP LaserJet Full Feature Software and Driver For Windows 8.1/8/7/vista/XP/2003/2008 | Download |
| HP ePrint Software For Windows 8.1/8/7 | Download |
| HP Smart Install Control Utility For Windows 8.1/8/7/vista/XP/2003/2008 | Download |
| HP Print and Scan Doctor For Windows 8.1/8/7/vista/XP | Download |
| HP Smart Install Update Utility For Windows 8.1/8/7/vista/XP/2003/2008 | Download |
| HP Smart Install Update Utility For Mac OS X 10.6/10.7/10.8/10.9 | Download |
| HP LaserJet P1102w Firmware Update Utility For Mac OS X 10.4/10.5/10.6/10.7/10.8/10.9 | Download |
| HP ePrint Software For Mac OS X 10.6/10.7/10.8/10.9 | Download |
Go to link download
Monday, August 29, 2016
How to Setup HP Wireless Network Auto Connect
How to Setup HP Wireless Network Auto Connect
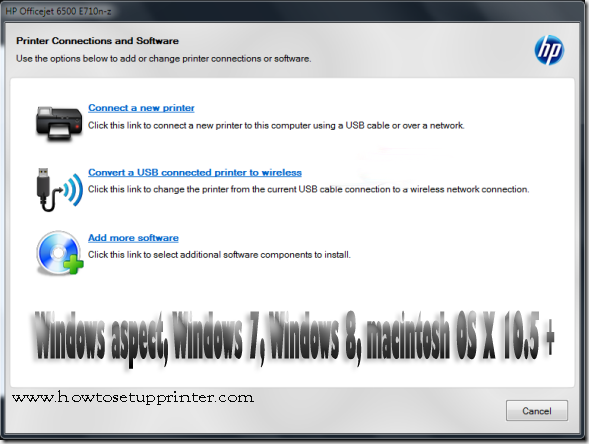 |
HP Auto Wireless Coonect |
Many more moderen horsepower printers can have this capability throughout the quality package installation method.
Not all computers or network configurations ar compatible with horsepower auto Wireless Connect. In these cases, associate alternate wireless setup technique are offered. To be compatible with horsepower auto Wireless Connect, subsequent conditions should be met :
- Your laptop uses Windows aspect, Windows 7, Windows 8, macintosh OS X 10.5 +.
- Your laptop uses a wireless association to your network and therefore the software package is on top of things of the wireless adapter so the horsepower package will retrieve the computers current network settings.
- Your laptop is connected to your 802.11b/g/n wireless router over a pair of.4 GHz association. Attention : horsepower Printers ar presently not compability with 802.11n 5.0 GHz networks.
- Your laptop do not use a static static scientific discipline address
- Your printer is in horsepower auto Wireless Connect mode. The printer are during this mode for one hour when its initial battery-powered on throughout installation before its connected to a network. TIP: If your printer has been battery-powered on for over one hour and therefore the package has not nonetheless tried to attach the printer to your wireless network, youll be able to reset this mode by exploitation the Restore Network Defaults possibility from the printer instrument panel. see your printer documentation for the way to perform Restore Network Defaults.
If horsepower auto Wireless Connect is obtainable throughout the installation of your printer, its the suggested setup technique. a part of the setup method needs your laptop to be briefly disconnected from your wireless network. throughout this point youll not have net access. take care to avoid wasting any on-line work and/or downloads before continued with this setup technique.
To use this selection, install the package for your printer and follow the onscreen directions. once prompted, choose the "Network (Ethernet/Wireless)" association sort and so opt for "Yes, send my wireless settings to the printer (recommended)". The horsepower package can the remainder.
If horsepower auto Wireless Connect is not offered throughout the package installation or if its not prospering, youll be target-hunting to use another wireless setup technique.
Go to link download
Tuesday, August 16, 2016
88w8335 Wireless Xp
88w8335 Wireless Xp
Here you can download 88w8335 wireless xp for Windows. Its secure, passed Kaspersky virus scan!
Info:
File: 88w8335_wireless_xp.zip
Version: 2.2.9
Size: 1 158 KB
OS: Windows
Upload source: manufactuter website
Go to link download
Saturday, August 6, 2016
Toshiba Satelite L755d Wireless Driver
Toshiba Satelite L755d Wireless Driver
Details about toshiba satelite l755d wireless driver.
Details:
File name: toshiba_satelite_l755d_wireless_driver.zip
Driver version: 1.4.3
File size: 13 490 KB
OS: Win XP, Win Vista, Windows 7, Windows 8
Go to link download