Showing posts with label effect. Show all posts

Thursday, December 8, 2016

Glowing Windows Logo Effect in Field Photoshop Tutorial

Glowing Windows Logo Effect in Field Photoshop Tutorial


In the following tutorial you will use Free Transform, Filter and Layer styles in Photoshop CS5 to create “Windows logo effect in green field”. You can use these techniques to create your own Photoshop Effect & Style after read this Tutorial.

Finale Result
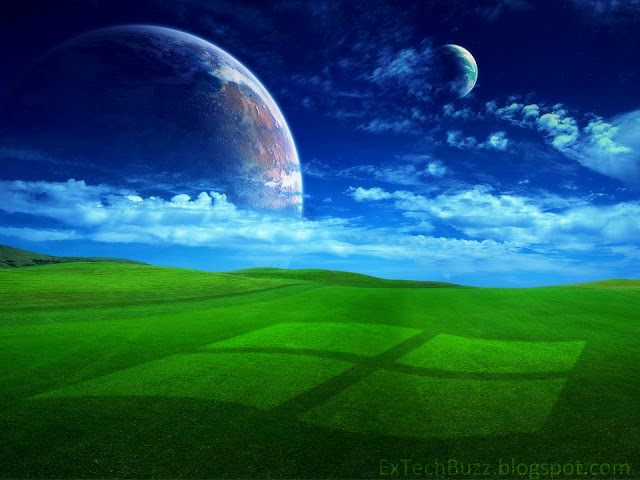
Here is a finale preview of what we are going to create with Photoshop. (Click on the image to see a large version of the result).

Glowing Windows Logo Effect in Field | Photoshop Tutorial 
 Click to enlarge


 Let's get started!

Read more »

Go to link download

Read more »

Monday, November 7, 2016

Add 3D Social Buttons With Rotate Spin Effect To Blogger

Add 3D Social Buttons With Rotate Spin Effect To Blogger


3D Social Buttons With Rotate Spin Effect
Today, I am back with beautiful 3D Social Buttons With Rotate Spin Effect For Blogger Blogs. You can see live demo on my Beautiful Blogger Widgets. These buttons created with the help of useful CSS trick. With CSS rotate when you place your cursor over each icon they spin 360 degrees, they spin back 360 when the cursor is removed.

You will see hover effect on these buttons.These buttons are related to your RSS feed, Email RSS, Facebook, Twitter, Google+, Pinterest and Feedburner reader count.

Thanks to Paul Crowe for making this beautiful widget. Please ask via comments if you are facing any problem.


Live Demo 3D Social Buttons With Rotate Spin


IconIconIconIconFollow Me on Pinterest


spice up your blog

How To Add 3D Social Buttons With Rotate Spin Effect To Blogger?

1. Go to Blogger Dashboard > Layout.
2. Click Add A Gadget > HTML Javascript.
3. Copy and paste below code in HTML Javascript Gadget.

<style>
#social a:hover {
background-color: transparent;opacity:0.7;
}
#social img {
-moz-transition: all 0.8s ease-in-out;
-webkit-transition: all 0.8s ease-in-out;
-o-transition: all 0.8s ease-in-out;
-ms-transition: all 0.8s ease-in-out;
transition: all 0.8s ease-in-out;
}
#social img:hover {
-moz-transform: rotate(360deg);
-webkit-transform: rotate(360deg);
-o-transform: rotate(360deg);
-ms-transform: rotate(360deg);
transform: rotate(360deg);
}
</style>
<center>
<div id="social"><a title="Grab Our Rss Feed" href="YOUR-FEED-URL-HERE" target="_blank"><img border="0" src="https://blogger.googleusercontent.com/img/b/R29vZ2xl/AVvXsEjD9obtJ3vxzmt6qpVSvsCpUWSCTtIcUi0ayvtZaLZaUZKwfBnQeTI9Ou5m1nkNXN9HHyj_EYZugk_67h7Hcb5_xZf0bBvJ0n6L3OlSmAMN3plNZ4AwcKn9psz3VuVM7ufFfv8uppRUUg80/s1600/RSS-48x48.png" style="margin-right:1px;" alt="Icon"/></a><a rel="nofollow" title="Get Free Updates Via Email" href="YOUR-EMAIL-RSS-URL-HERE" target="_blank"><img border="0" src="https://blogger.googleusercontent.com/img/b/R29vZ2xl/AVvXsEjwo44j3LMKF4ATTOOm-DtD-qLO6mOb1OHr8m7wLdVuNC2900G4SYgYhAxUETxr5QNKOue4waQH-loGB_ruYiceXaWmKeLuM9-QK7mZ5GOM9AXIWBB-O_s9-bleVxxkTjtnmMGVZIwi9Etx/s1600/RSS-EMAIL-48x48.png" style="margin-right:1px;" alt="Icon"/></a><a rel="nofollow" title="Like Our Facebook Page" href="YOUR-FACEBOOK-PAGE-URL-HERE" target="_blank"><img border="0" src="https://blogger.googleusercontent.com/img/b/R29vZ2xl/AVvXsEiLlx8KBLG672N1eNU7mUn8u4G8skxtI0X4gE1De0dCCzSvPJmgTNv1NzqbalsjLzw1j6y3jjRicIQMRiCAqA3mJZIjcJ7M69ZjujmIMjM4YY-uMclgCsh2gWl5IZRSYKoqbiTu6NjekBaV/s1600/FACEBOOK-48x48.png" style="margin-right:1px;" alt="Icon"/></a><a rel="nofollow" title="Follow Our Updates On Twitter" href="YOUR-TWITTER-URL-HERE" target="_blank"><img border="0" src="https://blogger.googleusercontent.com/img/b/R29vZ2xl/AVvXsEj0tHdXUqYOHvFiSntkZVQ3nv8DKpHYfeRtpSkO-OuDnqFDqa2J4XUVEN7OvMOfT_2pK2x2vdC4e3xjBE4SW9VgXa_OLtVzxewQDPe6o3gWRRgd7KrKWucce2ON2Hl-9F9c1wYZqnVpdPru/s1600/TWITTER-48x48.png" style="margin-right:1px;" alt="Icon"/></a><a title="Follow Us On Google+" rel="nofollow" href="YOUR-GOOGLE-PLUS-URL-HERE" target="_blank"><img style="margin-right:1px;" src="https://blogger.googleusercontent.com/img/b/R29vZ2xl/AVvXsEjWkatGusF4LyOjm78qAKCpgGavIBs-eEF9dKrZ6e-KA6idzQRQtXDPqCR25bwRgEZIVcEmJbXAw49f9Y6cE-9avo4aEI9PoIEkWWpxG790CauRMX6Yne9GG8m3eHZgOwmqgzyuVnSblQ8Q/s1600/GOOGLE-PLUS-48x48.png"/></a><a title="Follow Our Pins" rel="nofollow" href="YOUR-PINTEREST-URL-HERE" target="_blank"><img style="margin-right:1px;" src="https://blogger.googleusercontent.com/img/b/R29vZ2xl/AVvXsEhb07F6sT5OM5LDpQIdT8kVu3xpy6SHn92hl-poOmG4jK0LY7szaR951o_-95D6QB_lm33kR_xvTOMIuGJUj23LXwWvTYtRRzIvkmbnd0ZbIyqufftheRj76chcrLtjBVA_GLlWMsI3txNV/s1600/PINTEREST-48x48.png" alt="Follow Me on Pinterest" /></a></div>
<br/>
<a href="YOUR-FEEDBURNER-URL-HERE" target="_blank"><img alt="Beautiful Blogger Widgets" src="http://feeds.feedburner.com/~fc/beautifulbloggerwidgets?bg=ff9933&fg=000000&anim=1" style="border:0" /></a>
</center>

Note: Replace the following sections with your social profiles and feed URLs.

  • YOUR-FEED-URL-HERE
  • YOUR-EMAIL-RSS-URL-HERE
  • YOUR-FACEBOOK-PAGE-URL-HERE
  • YOUR-TWITTER-URL-HERE
  • YOUR-GOOGLE-PLUS-URL-HERE
  • YOUR-PINTEREST-URL-HERE
  • YOUR-FEEDBURNER-URL-HERE

4. Save it.

Thats it you have a very cool subscribe section on your blog. Thanks for reading it.
Go to link download

Read more »

Monday, October 31, 2016

How to make CSS3 keyboard like text effect in blogger And Website Post

How to make CSS3 keyboard like text effect in blogger And Website Post


How to make CSS3 keyboard like text effect in blogger
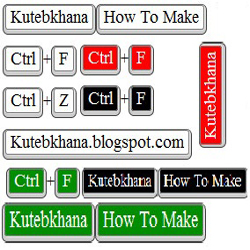
After giving Stylish Subscription Widget for Blogger Blog And Your Website. Now In This Tutorial, I will show you How to add Keyboard Keys Effect with CSS In your Blogger Blog And Website. You Can Easily Add This Effect to Every Blog Post And Every Your Web Post.  So now you want to Follow these simple Steps bellow.


How can you add keyboard keys effect in your blog post?


  • Log in to your blogger account.
  • Click on blog title in which you want to add This Keyboard Like Text Effect
  • Go to Template and then click on "Edit HTML" Check Expand Widget Box..
  • Now Find bellows code Using Ctrl+F Function.

]]></b:skin>

  • Paste bellow CSS Code  just above this ]]></b:skin>

Code for White color Keyboard Keys


KKW{
border:1px solid gray;
Background: #ffffff;
font-size:1.2em;
box-shadow:1px 0 1px 0 #eee, 0 2px 0 2px #ccc, 0 2px 0 3px #444;
-webkit-border-radius:3px;
-moz-border-radius:3px;
border-radius:3px;
margin:2px 3px;
padding:1px 5px;
}


Code for Black color Keyboard Keys


KKB{
border:1px solid gray;
Background: #000;
font-size:1.2em;
box-shadow:1px 0 1px 0 #eee, 0 2px 0 2px #ccc, 0 2px 0 3px #444;
Color:fff;
-webkit-border-radius:3px;
-moz-border-radius:3px;
border-radius:3px;
margin:2px 3px;
padding:1px 5px;
}


Code for Red color Keyboard Keys

KKR{
border:1px solid gray;
Background: #FF0000;
font-size:1.2em;
box-shadow:1px 0 1px 0 #eee, 0 2px 0 2px #ccc, 0 2px 0 3px #444;
Color:fff;
-webkit-border-radius:3px;
-moz-border-radius:3px;
border-radius:3px;
margin:2px 3px;
padding:1px 5px;
}


Code for Green color Keyboard Keys


KKG{
border:1px solid gray;
Background: #008E00;
font-size:1.2em;
box-shadow:1px 0 1px 0 #eee, 0 2px 0 2px #ccc, 0 2px 0 3px #444;
Color:fff;
-webkit-border-radius:3px;
-moz-border-radius:3px;
border-radius:3px;
margin:2px 3px;
padding:1px 5px;
}

Settings!

You Can Change highlighted code for change your keyboard background color. (Choose color From here)

Using in your blog post and pages

Please replace Write Your Word Here With Your Word!

For Black:
<KKB> Write Your Word Here </KKB>

 For White:
<KKW> Write Your Word Here </KKW>

For red:
<KKR> Write Your Word Here </KKR>

For Green:
<KKG> Write Your Word Here </KKG>


If you have any Kind of questions about this post, please lave a comments bellow. 

Do not forget to share this Post with your friends!


Go to link download

Read more »