Showing posts with label add. Show all posts

Wednesday, December 14, 2016

Add Stylish Email Subscriber For Blogger

Add Stylish Email Subscriber For Blogger


social subscription box for blogger

As every people know that every one have a facebook account and others social networking accounts. An
d people use that for the ease. When ever any one visits any blog and he likes that and want to share that post So he will found for the social networking buttons, so he/ she can easily can share your post. So just follow the below steps and add a stylish social subcription box.
Steps:

1. Go to your Blogger layout from the dashboard.2. Click on ADD A GADGET.3. Select html/javaScript.4. Now add the following code.

<!—START COPY FROM HERE-->

<style>
.touchme a {
display:block;
height:50px;
width:50px;
padding:0 4px;
float:left;
background:transparent url(https://blogger.googleusercontent.com/img/b/R29vZ2xl/AVvXsEjIY4WfB0_WzeY58pDpHd_MKIk0lttrA1KqnXQGbEi7edm8-OhLVtHsHvfxzsjzVcS1Tw5WMHSucPJHAvOi4xDkyMqN4ePX0xx1HtkXlg79_RrY29Nze0uJQGSeE4efDFJ30EdG0uBS4zRe/s454/Sharing%2520Touch%2520Me.png) no-repeat;
-webkit-transition: ease-in 0.2s all;
-moz-transition: ease-in 0.2s all;
-o-transition: ease-in 0.2s all;
-ms-transition: ease-in 0.2s all;
transition: ease-in 0.2s all;
cursor:pointer;
}.touchme a.googleplus {
background-position: 0px -58px;
}
.touchme a.googleplus:hover {
background-position: 0px 0px;
}.touchme a.twitter {
background-position: 0px -290px;
}
.touchme a.twitter:hover {
background-position: 0px -232px;
}
.touchme a.facebook {
background-position: 0px -406px;
}
.touchme a.facebook:hover {
background-position: 0px -348px;
}
.touchme a.rss {
background-position: 0px -174px;
}
.touchme a.rss:hover {
background-position: 0px -116px;
}
</style>
<div class=touchme>
<!--RSS-->
<a class=rss href="http://feedburner.google.com/fb/a/mailverify?uri=mybloggerpasion" rel=external nofollow target=_blank></a>
<!--Google Plus-->
<a class=googleplus href="https://plus.google.com/116038191764951410585" rel=external nofollow target=_blank></a>
<!--Facebook-->
<a class=facebook href=" http://www.facebook.com/SoftwaresRockers
" rel=external nofollow target=_blank></a>
<!-- Twitter -->
<a class=twitter href="https://twitter.com/mybloggerpasion" rel=external nofollow target=_blank ></a>
</div>
<style>
.tk-email{
background:url(https://blogger.googleusercontent.com/img/b/R29vZ2xl/AVvXsEiPplESW1So1tJIS5kXq6nY4wIGKd36YNLSHlm1Wp0sfgLvpYcyYRsqhxlUde33tVfZLbjCkNH2uHDG8bnjyrkIhd3iR8M9ow1Njmb0dEHkMWKL1lITjCaAUwNkGM1u8HgqeFR5O2gm-Ig6/s48/email%2520%25283%2529.png) no-repeat 0px 5px ;
width:300px;
padding:0px 0 0 55px;
float:left;
font-size:1.4em;
font-weight:bold;
margin:0 0 1px 0;
color:#686B6C;
}
.tk-emailsubmit{
background:#9B9895;
cursor:pointer;
color:#fff;
border:none;
padding:3px;
text-shadow:0 -1px 1px rgba(0,0,0,0.25);
-moz-border-radius:6px;
-webkit-border-radius:6px;
border-radius:6px;
font:12px sans-serif;
}
.tk-emailsubmit:hover{
background:#3d87d0;
}
.textarea{
padding:2px;
margin:6px 2px 6px 2px;
background:#f9f9f9;
border:1px solid #ccc;
resize:none;
box-shadow:inset 1px 1px 1px rgba(0,0,0,0.1);
-moz-box-shadow:inset 1px 1px 1px rgba(0,0,0,0.1);
-webkit-box-shadow:inset 1px 1px 1px rgba(0,0,0,0.1); font-size:13px;
width:150px;
color:#666;}
</style>
<div class="tk-email">
Subscribe via Email
<form action="http://feedburner.google.com/fb/a/mailverify?uri=mybloggerpasion" id="feedform" method="post" target="popupwindow" onsubmit="window.open(http://feedburner.google.com/fb/a/mailverify?uri=techkgp, popupwindow, scrollbars=yes,width=550,height=520);return true">
<input gtbfieldid="3" class="textarea" name="email" onblur="if (this.value == &quot;&quot;) {this.value = &quot;Enter email address here&quot;;}" onfocus="if (this.value == &quot;Enter email address here&quot;) {this.value = &quot;&quot;;}" value="Enter email address here" type="text" />
<input type="hidden" value="Techkgp" name="uri"/><input type="hidden" name="loc" value="en_US"/>
<input class="tk-emailsubmit" value="Submit" type="submit" />
<a href="www.tricksmode.com" rel="dofollow"><font size="0.1" color="#C0C0C0">facebook tricks</font></a>
</form>
</div>
<!—STOP COPY HERE-->

5. now change my url with yours and save

Go to link download

Read more »

Friday, November 25, 2016

Add An Awesome Fixed Position Slide Open Heart Bookmarking Gadget To Blogger

Add An Awesome Fixed Position Slide Open Heart Bookmarking Gadget To Blogger


Blogger Bookmarking Gadget
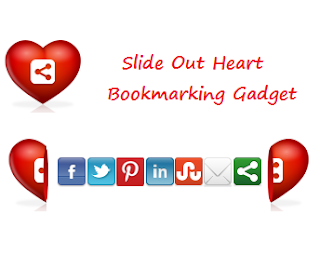
In this post i want to show you a cool new way to have visitors sharing your blog posts.Share This has always been my Bookmark tool of choice and recently they added a cool new interactive Bookmarking gadget.The gadget in question is a love heart with the share this logo and on hover the heart splits to reveal a selection of bookmarking buttons.It looks awesome and the slide effect is very cool while still being practical.When the heart opens it reveals icons for Facebook, Twitter, Pinterest, LinkedIn, Stumble Upon, Email and the Share This Icon Offers hundreds more bookmarking choices.I think this gadget fixed in the corner of the page on your blog will grab the attention of visitors and
generate lots more shares.So below is a tutorial showing you just how to do that, first check out the live demo.

Add The Split Heart Bookmarking Gadget Top Your Blog


Remember Always Back Up Your Template Before You Make Changes

Step 1. In Your Blogger Dashboard Click Design > Edit Html

Step 2. Find the following piece of code in your blogs Html : (Click Ctrl and F for a search bar to help find the code
 </head>
Step 3. Copy and Paste the following code Directly Above / Before </head>

<!-- Start Heart Bookmarking Gadget Code From http://shakeelasghar.blogspot.com// -->
<script src=http://w.sharethis.com/gallery/shareegg/shareegg.js type=text/javascript/>
<script src=http://w.sharethis.com/button/buttons.js type=text/javascript/>
<script type=text/javascript>stLight.options({publisher: &quot;ur-98d377f-bdd3-9ad1-fbe5-2a678f0a60ee&quot;, onhover:false}); </script>
<link href=http://w.sharethis.com/gallery/shareegg/shareegg.css media=screen rel=stylesheet type=text/css/>
<!-- End Heart Bookmarking Gadget Code From http://shakeelasghar.blogspot.com// -->

Step 4. Find the following piece of code in your blogs Html : (Click Ctrl and F for a search bar to help find the code.
</body>

Step 5. Now Copy And Paste This Code Directly Above / Before </body>


<!-- Start Heart Share Code From http://shakeelasghar.blogspot.com// -->
<div style=position: fixed; bottom: 2%; left: 2%;>
<div class=shareEgg id=shareThisShareHeart/>
</div>
<script type=text/javascript>stlib.shareEgg.createEgg(&#39;shareThisShareHeart&#39;, [&#39;facebook&#39;,&#39;twitter&#39;,&#39;pinterest&#39;,&#39;linkedin&#39;,&#39;stumbleupon&#39;,&#39;email&#39;,&#39;sharethis&#39;], {title:&#39; <data:blog.pageTitle/>&#39;,url:&#39;<data:blog.url/>&#39;,theme:&#39;shareheart&#39;});</script><a href="http://shakeelasghar.blogspot.com//">Blogger Wordpress Gadgets</a><!-- End Heart Share Code From http://shakeelasghar.blogspot.com// -->
Important, Move The Position Of The Gadget :

The Gadget is currently set to be in the bottom right corner of your blog but you can easily change this.In yellow above you can see bottom: 2%; left: 2%;.You can change Bottom to top for it to be at the top of the page and left to right for it to be on the right of the page.You can also change the percentages to have it further from the bottom/top and left/right.

Step 6. Save Your Template.

Thats it the gadget has been added to your blog.Make sure to check out more of our Blog Gadgets and Social Bookmarking Gadgets.

Go to link download

Read more »

Monday, November 21, 2016

How to Add Chitika Ads Inside Your Blogger Blog Post

How to Add Chitika Ads Inside Your Blogger Blog Post


In This Tutorial I am Gonna Teach You....
How to Add Chitka Ads Inside Your Blogger Blog Post

Lets See How ....?
So Easy...
Just Follow Me...


Step :1
Past Your Chitika Code in This " Chitika Code Convertor "
Click on " Convert Ad Code "
Copy Code and Save in Notepad ....


Step :2
Now Sign in Blogger Account 
Click on " Design " Tab
 Step:3
Click on " Edit Html "
Step:4
Check on " Expand Widget Templates "

Step:5
Press " Ctrl + F " and Search This

 <div class=post-header-line-1/>
Step:6
Past This Code.. ( Replace " Past Your Converted Chitika Code "  With Your Converted Code )

Left
<b:if cond=data:blog.pageType == "item">
<div style="float:left;">
Past Your Converted Chitika Code
</div>
</b:if>
Right Side

<b:if cond=data:blog.pageType == "item">
<div style="float:right;">
Past Your Converted Chitika Code
</div>
</b:if>
Center
<b:if cond=data:blog.pageType == "item">
<div align="center">
Past Your Converted Chitika Code
</div>
</b:if>
 Step :7
 Save Template & Vist Blog & See Result .....Mission Complete

Go to link download

Read more »

Wednesday, November 16, 2016

Add Nivo Slider to Your Blogger Blog UPDATED

Add Nivo Slider to Your Blogger Blog UPDATED


Today I'm sharing another awesome, beautiful image slider for Blogger/ BlogSpot blog. It is made with jQuery. and of course HTML and CSS but the main awesomeness, sliding effect is made with jQuery. This image slider is created by dev7studios.com/nivo-slider/. They did really a great job. This slider have downloaded more than 20,00000 times from their site. I have made a bloggerized version of the slider. See demo below.
  • DEMO
  • DOWNLOAD
Read more »

Go to link download

Read more »

Tuesday, November 15, 2016

How to Add Adhitz com Ads Inside Your Blogger Blog Post

How to Add Adhitz com Ads Inside Your Blogger Blog Post


In This Tutorial I am Gonna Teach You....
How to Add Adhitz.Com Ads Inside Your Blogger Blog Post

Lets See How ....?
So Easy...
Just Follow Me...


Step :1
Past Your Chitika Code in This " Adhitz Code Convertor "
Click on " Convert Ad Code "
Copy Code and Save in Notepad ....


Step :2
Now Sign in Blogger Account 
Click on " Design " Tab
 Step:3
Click on " Edit Html "
Step:4
Check on " Expand Widget Templates "

Step:5
Press " Ctrl + F " and Search This

 <div class=post-header-line-1/>
Step:6
Past This Code.. ( Replace " Past Your Converted Adhitz Code "  With Your Converted Code )

Left
<b:if cond=data:blog.pageType == "item">
<div style="float:left;">
Past Your Converted Adhitz Code
</div>
</b:if>
Right Side

<b:if cond=data:blog.pageType == "item">
<div style="float:right;">
Past Your Converted Adhitz Code
</div>
</b:if>
Center
<b:if cond=data:blog.pageType == "item">
<div align="center">
Past Your Converted Adhitz Code
</div>
</b:if>

Step :7
 Save Template & Vist Blog & See Result .....Mission Complete


Go to link download

Read more »

Monday, November 14, 2016

How To Add Facebook Like Page Box In Your Bloggers Blog

How To Add Facebook Like Page Box In Your Bloggers Blog


facebook like box
Now in this topic/tutorial I am going to tell you about how you can add a Facebook page like box into your website or blogger blog without difficulty. This is a great widget for blogger blog and websites which is used to promote your fan page and definitely increase your like. 
So, follow these steps to add social media Facebook page like box in blogger.


Add Facebook Page like Box to Blogger:

  •  Log in to your blogger account.
  •  Click on blog title in which you want to add This beautiful like box.
  •  Go to layout and then click on Add a Gadget.
  •  Select Html/JavaScript and paste the below code in it. 


<iframe src="//www.facebook.com/plugins/likebox.php?href=http://www.facebook.com/kutebkhana&amp;width=320&amp;height=275&
amp;colorscheme=light&amp;show_faces=true&amp;border_color&amp;stream=false&amp;header=false&amp;" style="border:none; overflow:hidden; width:320px; height:258px;" ></iframe>


Customization!


  • Replace kutebkhana page title with your own page title.
  •   Change width=320 and height=275 according to your blog template and save the gadget.

 You Are  Done!


Go to link download

Read more »

Friday, November 11, 2016

How to add Blogger Share Buttons to Custom Blogger Templates

How to add Blogger Share Buttons to Custom Blogger Templates


https://blogger.googleusercontent.com/img/b/R29vZ2xl/AVvXsEh39BXuWS9LORvjYS4mhDmNb9hqrRpnvnZ_UmgSio7roY9cQhuRCNsWmVKeACQLY2zPL8MrIvxJehx_TeFtvAavWO4W5Y3CB8xeVoCDBGXmcOJAQrgA0uo_s8TivS85Q_kHGNOvmegLm8j9/s1600/blogger+share+buttons.jpg
Recently, Blogger released their new Share Buttons feature which makes it easier for your Blog visitors to bookmark, tweet, fshare, email ,etc your post.

But, if youre using any custom blogger template.. you may not see the widget appearing in blog..even though you activate it.

So, if you have that problem. here is how to fix it.
(before making any changes..first backup your template)

1. Sign into Blogger > Design > Edit html
(tick the expand widget templates)

2. Add this line anywhere you want the widget to appear


<b:include data=post name=shareButtons/>


Normally, in most templates, you can add it after this line..


<p class=post-footer-line post-footer-line-1>


If you dont find that above line in your template....
Find this one.


<p><data:post.body/></p>


and add this code after that line..


<p><data:post.body/></p>
<div style=clear:both; padding: 10px 10px 10px 10px;> <b:include data=post name=shareButtons/> </div>


Note: If youre using Magazine style blogger template, You can find the data:post.body line TWO TIMES.. So, try in both ways and find out which one is working..and remove the other one.

Finally..Save the template!

If you still dont see it in your Blog, Make sure..you activated it by going to
Blogger dashboard > Design > Click the edit button of the Blog post section.


Go to link download

Read more »

Monday, November 7, 2016

Add 3D Social Buttons With Rotate Spin Effect To Blogger

Add 3D Social Buttons With Rotate Spin Effect To Blogger


3D Social Buttons With Rotate Spin Effect
Today, I am back with beautiful 3D Social Buttons With Rotate Spin Effect For Blogger Blogs. You can see live demo on my Beautiful Blogger Widgets. These buttons created with the help of useful CSS trick. With CSS rotate when you place your cursor over each icon they spin 360 degrees, they spin back 360 when the cursor is removed.

You will see hover effect on these buttons.These buttons are related to your RSS feed, Email RSS, Facebook, Twitter, Google+, Pinterest and Feedburner reader count.

Thanks to Paul Crowe for making this beautiful widget. Please ask via comments if you are facing any problem.


Live Demo 3D Social Buttons With Rotate Spin


IconIconIconIconFollow Me on Pinterest


spice up your blog

How To Add 3D Social Buttons With Rotate Spin Effect To Blogger?

1. Go to Blogger Dashboard > Layout.
2. Click Add A Gadget > HTML Javascript.
3. Copy and paste below code in HTML Javascript Gadget.

<style>
#social a:hover {
background-color: transparent;opacity:0.7;
}
#social img {
-moz-transition: all 0.8s ease-in-out;
-webkit-transition: all 0.8s ease-in-out;
-o-transition: all 0.8s ease-in-out;
-ms-transition: all 0.8s ease-in-out;
transition: all 0.8s ease-in-out;
}
#social img:hover {
-moz-transform: rotate(360deg);
-webkit-transform: rotate(360deg);
-o-transform: rotate(360deg);
-ms-transform: rotate(360deg);
transform: rotate(360deg);
}
</style>
<center>
<div id="social"><a title="Grab Our Rss Feed" href="YOUR-FEED-URL-HERE" target="_blank"><img border="0" src="https://blogger.googleusercontent.com/img/b/R29vZ2xl/AVvXsEjD9obtJ3vxzmt6qpVSvsCpUWSCTtIcUi0ayvtZaLZaUZKwfBnQeTI9Ou5m1nkNXN9HHyj_EYZugk_67h7Hcb5_xZf0bBvJ0n6L3OlSmAMN3plNZ4AwcKn9psz3VuVM7ufFfv8uppRUUg80/s1600/RSS-48x48.png" style="margin-right:1px;" alt="Icon"/></a><a rel="nofollow" title="Get Free Updates Via Email" href="YOUR-EMAIL-RSS-URL-HERE" target="_blank"><img border="0" src="https://blogger.googleusercontent.com/img/b/R29vZ2xl/AVvXsEjwo44j3LMKF4ATTOOm-DtD-qLO6mOb1OHr8m7wLdVuNC2900G4SYgYhAxUETxr5QNKOue4waQH-loGB_ruYiceXaWmKeLuM9-QK7mZ5GOM9AXIWBB-O_s9-bleVxxkTjtnmMGVZIwi9Etx/s1600/RSS-EMAIL-48x48.png" style="margin-right:1px;" alt="Icon"/></a><a rel="nofollow" title="Like Our Facebook Page" href="YOUR-FACEBOOK-PAGE-URL-HERE" target="_blank"><img border="0" src="https://blogger.googleusercontent.com/img/b/R29vZ2xl/AVvXsEiLlx8KBLG672N1eNU7mUn8u4G8skxtI0X4gE1De0dCCzSvPJmgTNv1NzqbalsjLzw1j6y3jjRicIQMRiCAqA3mJZIjcJ7M69ZjujmIMjM4YY-uMclgCsh2gWl5IZRSYKoqbiTu6NjekBaV/s1600/FACEBOOK-48x48.png" style="margin-right:1px;" alt="Icon"/></a><a rel="nofollow" title="Follow Our Updates On Twitter" href="YOUR-TWITTER-URL-HERE" target="_blank"><img border="0" src="https://blogger.googleusercontent.com/img/b/R29vZ2xl/AVvXsEj0tHdXUqYOHvFiSntkZVQ3nv8DKpHYfeRtpSkO-OuDnqFDqa2J4XUVEN7OvMOfT_2pK2x2vdC4e3xjBE4SW9VgXa_OLtVzxewQDPe6o3gWRRgd7KrKWucce2ON2Hl-9F9c1wYZqnVpdPru/s1600/TWITTER-48x48.png" style="margin-right:1px;" alt="Icon"/></a><a title="Follow Us On Google+" rel="nofollow" href="YOUR-GOOGLE-PLUS-URL-HERE" target="_blank"><img style="margin-right:1px;" src="https://blogger.googleusercontent.com/img/b/R29vZ2xl/AVvXsEjWkatGusF4LyOjm78qAKCpgGavIBs-eEF9dKrZ6e-KA6idzQRQtXDPqCR25bwRgEZIVcEmJbXAw49f9Y6cE-9avo4aEI9PoIEkWWpxG790CauRMX6Yne9GG8m3eHZgOwmqgzyuVnSblQ8Q/s1600/GOOGLE-PLUS-48x48.png"/></a><a title="Follow Our Pins" rel="nofollow" href="YOUR-PINTEREST-URL-HERE" target="_blank"><img style="margin-right:1px;" src="https://blogger.googleusercontent.com/img/b/R29vZ2xl/AVvXsEhb07F6sT5OM5LDpQIdT8kVu3xpy6SHn92hl-poOmG4jK0LY7szaR951o_-95D6QB_lm33kR_xvTOMIuGJUj23LXwWvTYtRRzIvkmbnd0ZbIyqufftheRj76chcrLtjBVA_GLlWMsI3txNV/s1600/PINTEREST-48x48.png" alt="Follow Me on Pinterest" /></a></div>
<br/>
<a href="YOUR-FEEDBURNER-URL-HERE" target="_blank"><img alt="Beautiful Blogger Widgets" src="http://feeds.feedburner.com/~fc/beautifulbloggerwidgets?bg=ff9933&fg=000000&anim=1" style="border:0" /></a>
</center>

Note: Replace the following sections with your social profiles and feed URLs.

  • YOUR-FEED-URL-HERE
  • YOUR-EMAIL-RSS-URL-HERE
  • YOUR-FACEBOOK-PAGE-URL-HERE
  • YOUR-TWITTER-URL-HERE
  • YOUR-GOOGLE-PLUS-URL-HERE
  • YOUR-PINTEREST-URL-HERE
  • YOUR-FEEDBURNER-URL-HERE

4. Save it.

Thats it you have a very cool subscribe section on your blog. Thanks for reading it.
Go to link download

Read more »

Monday, September 26, 2016

Add Floating Spoiler Menu To Blogger

Add Floating Spoiler Menu To Blogger


Adding Floating Spoler Menu To Blogger makes The blog More Navigable and Easy.You May Have Seen Many Floating Menu for Bloggers,But This Menu is Awesome .In This Menu You Have not Have To Click The Button To Float The Menu.Whoever When Near The Mouse Cursor it Slides Very Smoothly .So This is The Great Difference B/w Other Floating Menus and This one.

...................................................................................................................................................................
 Floating Spoiler Menu Live Demo.
...................................................................................................................................................................
Live Demo
...................................................................................................................................................................
How To Add Floating Spoiler Menu To Blogger
...................................................................................................................................................................
Now How To Add Floating Spoiler Menu To Blogger.Follow The Below Simple Steps.
1) Go To Blogger.com
2) Now Blogger Dashboard.
3) Click On Layout/Design.
4) Click On Add a Widget.
5) Select HTML/JavaScript.
6) Paste The Below Script/Code into The Box.
<style text-type="CSS">#bmenu{position:fixed;right:5px;center:0px;background-color:#000;border-radius:10px;-moz-border-radius:10px;border:1px solid #FFF;width:202px;height:20px;color:#FF0606;transition:all .5s ease-in;-moz-transition:all .5s ease-in;-webkit-transition:all .5s ease-in;-o-transition:all .5s ease-in;z-index:3;overflow:hidden;padding:9px 15px 10px;}
#bmenu h3{margin:0;padding:0;text-align:center;cursor:pointer;}
#bmenu ul{border-radius:10px;-moz-border-radius:10px;border:2px solid #FFf;background-color:#FF0606;margin:15px 0;padding:0 15px;}
#bmenu li{list-style:none;margin:0 0 5px;padding:0;} #bmenu li a{color:#000;text-decoration:none;font-size:14px;}
#bmenu li a:hover{color:#fff;}
#bmenu:hover{z-index:5;height:175px;</style>
<div id="bmenu"><h3>TITLE</h3><ul><li><a href="#">FBT-1</a></li><li><a href="#">FBT-2</a></li><li><a href="#">FBT-3</a></li><li><a href="#">FBT-4</a></li><li><a href="#">FBT-5</a></li></ul></div>
................................................................................................................................................................. 
Customization/Changing. 
.................................................................................................................................................................
=> The Position Of Floating Spoiler Menu(means The Red Color Shows Size and Position).
=> The Title Of This menu(means The Green Color Indicates The Title Name You can Change it xD)
=> The Title and Link location ( Put Your Own Desire Links Over There).

Go to link download

Read more »

Saturday, September 17, 2016

How to Add Adsense Ads Inside Your Blogger Blog Post

How to Add Adsense Ads Inside Your Blogger Blog Post


In This Tutorial I am Gonna Teach You....
How to Add Adsense Ads Inside Your Blogger Blog Post

Lets See How ....?
So Easy...
Just Follow Me...


Step :1
Copy this code in notepad

 <b:if cond=data:blog.pageType == &quot;item&quot;>
<div class=adsense>
<center><b>
Insert your google adsense code Here</b></center>
</div>
</b:if>

Step :2

 Replace your adsanse code with Insert your google adsense code Here

Step :3

Now Sign in Blogger Account 
Click on " Design " Tab
 Step:4
Click on " Edit Html "
Step:5
Check on " Expand Widget Templates "

Step:
Press " Ctrl + F " and Search This

 <div class=post-header-line-1/>
Step:6
Past This Code.. ( Replace " Past Your Converted Adsense Code "  With Your Converted Code )


Left
  <b:if cond=data:blog.pageType == &quot;item&quot;>
<div class=adsense>
<left><b>
Insert your google adsense code Here</b></left>
</div>
</b:if>
Right Side
  <b:if cond=data:blog.pageType == &quot;item&quot;>
<div class=adsense>
<right><b>
Insert your google adsense code Here</b></right>
</div>
</b:if>
Center
  <b:if cond=data:blog.pageType == &quot;item&quot;>
<div class=adsense>
<center><b>
Insert your google adsense code Here</b></center>
</div>
</b:if>
 Step :7
 Save Template & Vist Blog & See Result .....Mission Complete


Go to link download

Read more »

Tuesday, September 13, 2016

Add Author Box with Rotator Image Effects in Blogger Sidebar or Footer

Add Author Box with Rotator Image Effects in Blogger Sidebar or Footer


Add Author Box
This is my first time to share a tutorial 
how to Add Author Box with Rotator Image
Effects in Blogger Sidebaror Footer. 
This author box contains rotator image effect 
that means when your mouse cursor come on
image then it will rotate. I have tried to bring 
little variety I include colored border your can 
easily change color of border and other things.
This widgets Have great css effect.


How can you Add Author Box in bloggers blog?

  • Log in to your blogger account.
  •  Click on blog title in which you want to add This Author  box.
  •  Go to layout and then click on Add a Gadget.
  • Select "HTML/JavaScript" Widget.
  •  Copy the below code and paste in it then Hit save.
Live Demo


<style>.KHprofileBorder {margin:5px auto;padding:10px;width:auto;
border-radius:5px;border: 2px #3322dd
solid;min-height:125px;
width:275px;}
#KHprofile{border:2px solid #888;
margin:2px 5px 0px 5px; padding:2px;

    }

    #KHprofile:hover {border:2px solid #ccc;cursor:pointer;

    }

    .KHprofileopacity  {opacity: 0.5;margin-left: 50px;
-moz-transition: all 0.5s ease-out;
  -o-transition:
all 0.5s ease-out;
-webkit-transition: all 0.5s ease-out;  -ms-transition:
all 0.5s ease-out;
transition: all 0.5s ease-out;
-moz-transform: rotate(8deg);
 -o-transform: rotate(8deg);
 -webkit-transform: rotate(8deg);
 -ms-transform: rotate(7deg);  transform: rotate(8deg);
sizingMethod=auto expand);
zoom: 1;  }
.KHprofileopacity:hover  {opacity: 1;
margin-left: 0px;-moz-transform:
rotate(0deg);  -o-transform: rotate(0deg);
-webkit-transform: rotate(0deg);
 -ms-transform: rotate(0deg);
transform: rotate(0deg);

sizingMethod=auto expand);
zoom: 1;
-moz-box-shadow: 1px 1px 4px #000;
-webkit-box-shadow: 2px 2px 8px #000;
box-shadow: 2px 2px 8px #000;} </style>

<div class="KHprofileBorder">

<img class="KHprofileopacity" id="KHprofile" height=65

src="http://3.bp.blogspot.com/-61Gvbm5glB8/

UPpeVQAMZ1I/AAAAAAAAADM/oAOmgWv2GLI/s1600

/429379_242610719163393_2098735386_n.jpg "

width=50 align="left"/>Im
<a rel="me" href=https://plus.google.com
/u/0/116054827022382240041/

title="Shakeel Asghar" target="_blank"> Shakeel Asghar
</a>from Lahore Pakistan. Founder of
<a href="http://kutebkhana.blogspot.com/">KutebKhana</a>
I love to blogging and
sharing tips and tricks with my readers.
I
 am a Part time blogger.
Design Blogger template,               
 Web Developing and Designing.>>><a style="color:red;
"href="http://kutebkhana.blogspot.com/p/blog-
page.html " target="_blank">Read More &#187;</a>
</div></div>

Customization!


  •  Change 116054827022382240041
    with your G+ ID and write your own information.
  • Change http://kutebkhana.blogspot.com/p/blog-page.html
    link with your About Us Page.
  • Change http://3.bp.blogspot.com/-61Gvbm5glB8
    /UPpeVQAMZ1I/AAAAAAAAADM/oAOmgWv2GLI/s1600
    /429379_242610719163393_2098735386_n.jpg

    with your Image link. 
  • If you want to change height and width of
    width then simply change for
    height
        125px For width 275px.


Enjoy You Are Done!


Go to link download

Read more »